
Storing, Sharing, Viewing and Analyzing Your 3D Images Online Since 2018
Newsletter – February 2020
Introduction
Welcome to our inaugural newsletter! Since publicly launching ProfilmOnline in 2018, we’ve experienced tremendous growth and added many features, improvements, and support for more than 30 image file formats. Last month, we celebrated the second anniversary of ProfilmOnline, and appreciate your interest and the attention it’s received.
In this newsletter, we’re highlighting some of the changes we’ve made this past year.
3D Imaging Integration
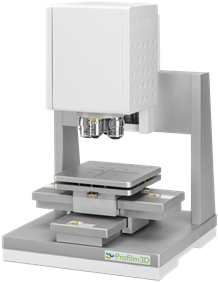
Did you know that there is an affordable instrument capable of quickly imaging your samples at high resolution and uploading the images to ProfilmOnline? The Profilm3D family of optical profilers runs on Profilm software, which mirrors ProfilmOnline. If you’re familiar with ProfilmOnline, you’ll be immediately comfortable with Profilm. Analysis recipes created in ProfilmOnline can be used in Profilm, allowing you to develop and refine your analysis on any platform, then use it everywhere. When viewing an image in Profilm, you can upload it to ProfilmOnline with a single click.
New Features
![]() Encryption – Encrypt your files to ensure data security
Encryption – Encrypt your files to ensure data security
Many users requested the ability to encrypt their data to ensure their images cannot be viewed by anyone else. Implementation of this feature was a significant change to the application. When you enable encryption in your account, our server securely encrypts your uploaded images and any new images you upload will be automatically encrypted. When viewing, analyzing, or otherwise accessing an image, the application temporarily decrypts it into volatile storage for display or calculation using the credentials you provide during sign-in. We’ve implemented image encryption such that there is no back door. We cannot recover your images if you forget your password, so proper precautions must be taken to ensure that your password (or the recovery key that we issue to you at the time you enable encryption) will not be forgotten or lost. To learn more, or to enable encryption on your account, edit your ProfilmOnline profile and click Enable encryption. You’ll see a dialog with detailed information, where you must enter your password before encryption will be activated.
![]() True Color TotalFocus™ Images – See a color view of your sample surface in 3D
True Color TotalFocus™ Images – See a color view of your sample surface in 3D
You’re already familiar with false-color 3D images where the surface of the image is colored according to the height of each pixel. However, in many applications, it’s helpful to render a color image of your sample onto the 3D surface rather than the color gradient that’s normally used. Advanced imaging systems such as the Profilm3D optical profiler can produce such images, allowing you to view and understand details of your sample in ways that were never possible before. True Color TotalFocus™ images are like what you see with a traditional optical microscope. The difference is that in a TotalFocus™ image, every pixel is in focus and the image is rendered in 3D so you can tip and tilt it to discern subtle details. ProfilmOnline now supports the display of such images. To learn more, click/tap the image thumbnails below to see some of the TotalFocus™ images in our Public gallery.


![]() Image Stitching – Form a composite image from separate overlapping images
Image Stitching – Form a composite image from separate overlapping images
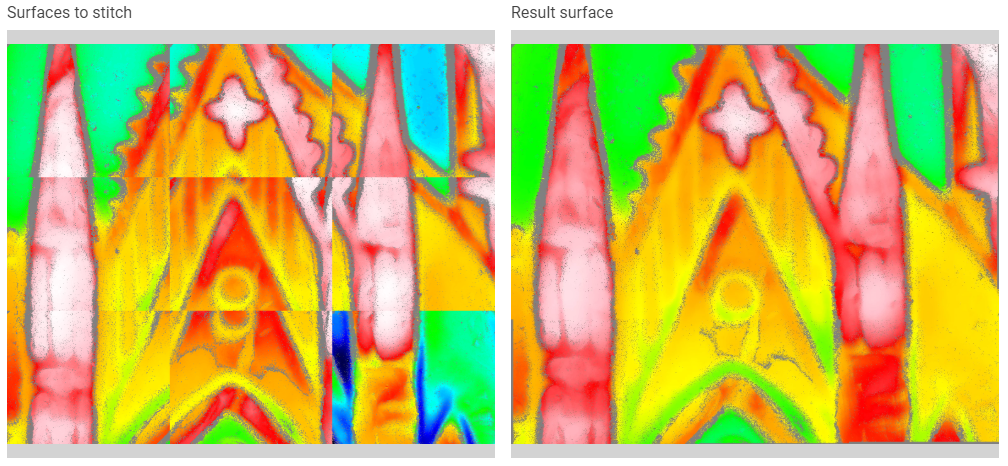
Sometimes you’d like an image of a large area, but you need high resolution to resolve the features within the area, limiting the field of view. The solution is to acquire individual overlapping images and combine them to form a single large image. The 50 Euro Cent coin image that’s featured on the ProfilmOnline Home Page is an example of this type of image. A Profilm3D optical profiler was used to capture 130 overlapping images that were combined into a single image using the Stitch function. To try the Stitch function yourself, select two or more overlapping images and click the Stitch button in the ribbon. The screenshot below shows an example of the Stitch dialog when combining nine images.
![]() Image Subtraction – Subtract one 3D image from another
Image Subtraction – Subtract one 3D image from another
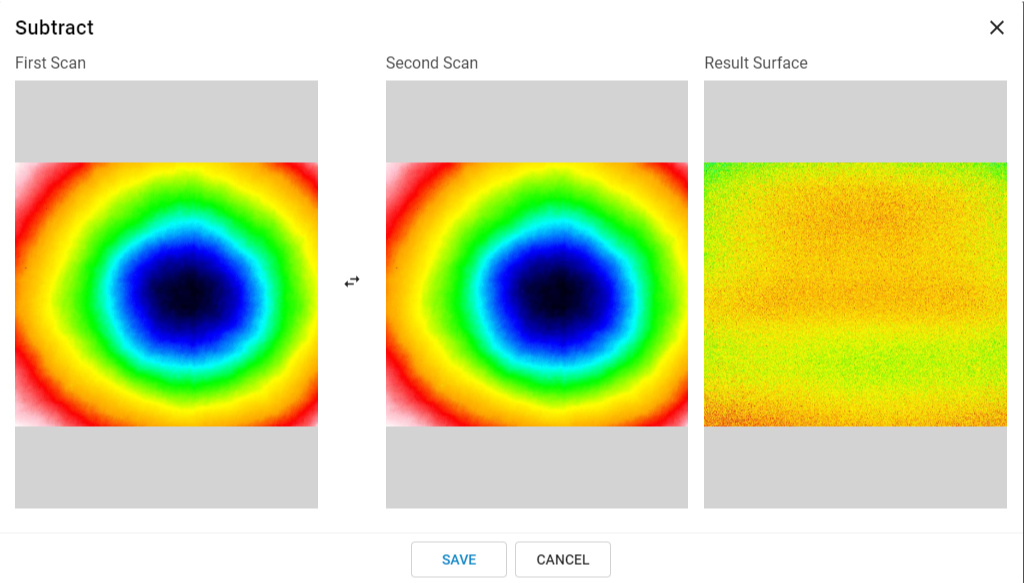
When analyzing material removal or deposition, it’s desirable to form a difference image. You can use the Image Subtraction function to perform this operation. To try it out, select two images and click the Subtract button in the ribbon. The application displays the Subtract dialog, showing you a preview of the result and giving you the option of swapping the images so you can determine which image is the starting image and which is the subtracted image.
![]() Folder Download/Upload – Move an entire folder of images
Folder Download/Upload – Move an entire folder of images
Sometimes you have an entire folder full of images that you’d like to transfer to ProfilmOnline. Now you can drag and drop the folder into your My Images page in the application. Not only are all the images in the folder uploaded, but any subfolders (and their images and subfolders) are uploaded as well. In this way you can quickly and easily upload an entire directory tree of folders and images. Alternatively, you can click the Upload image button in the ribbon and click “Choose directory to upload.” In a similar fashion, you can download a directory tree from your My Images gallery by selecting a folder and clicking the Download button in the ribbon.
![]() Download Screenshot – Render 3D view as 2D image
Download Screenshot – Render 3D view as 2D image
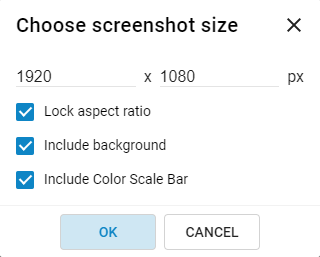
When producing a presentation or other document, you may need to render a 2D view of your 3D image. Now you can quickly and easily do so by clicking the Download button in the File ribbon when viewing an image. The download dialog offers a new option named “Screenshot.” Clicking the Screenshot option triggers display of a second dialog (shown below) where you can specify the image resolution and other options. You can even produce a 2D image that’s larger than your browser window, which can be useful if want to create a high-resolution image.
New Analyses
![]() New Area Roughness Parameters
New Area Roughness Parameters
We’ve continued to expand our list of measured parameters. In the past year we’ve added Smr, Smc, Sdar and Spar. You can view the entire list of parameters by clicking the settings gear icon at the top-left corner of the Area Roughness results pane.
![]() Angle Measurement
Angle Measurement
The Dimension analysis mode now includes the ability to measure angles. Just click/tap “Add angle,” position the vertices of the line segments that appear in the Top View image, and view the measured angle in the results pane.
Future Topics
To keep our user community up to date, we plan to publish additional newsletters this year in May and September. In future editions, we’ll be highlighting more updates from the past year as well as discussing planned new features. We hope you find this newsletter informative and that you’ll add profilmonline.com to your approved senders list so the next newsletter reaches you in an timely fashion. Below are some of the topics planned for the next newsletter.
- Enhanced Operators
- Usability improvements
- Support for more image file formats
Best regards and Happy 2020!
The ProfilmOnline Team
Copyright © 2020 Filmetrics, A KLA Company, All rights reserved.